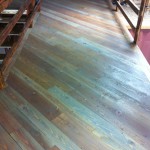
 Good and beautiful things take time to install and grow. As with painting a good picture or growing a beautiful lush garden, installing fir flooring takes a tremendous amount of time and patience. When it is installed well, however, your fir flooring will definitely add more value and beauty to your home or barn for generations to come.Fir floor is considered softwood by home builders. For the most part, it is installed in a similar way as with other solid wood flooring, except that it is finished differently. A DIY handyman or a homeowner with no or little experience in woodworking can install fir flooring in a couple of days or more, depending on the scope and size of the project.
Materials and tools that you need for the installation
· Finish nailer
· Wood floor nailer
· Fir floor
· Measuring tape
· Chalk line
· Staple nailer
· Felt paper
Steps
1. In the subflooring, set the nails using a hammer. Using your wood screws, attach the loose plywood subflooring to prevent it from shifting or moving, once the installation of the fir flooring is finished.
2. Remove the debris, and clean the plywood with a vacuum cleaner or broom. Likewise, remove the drywall stuck-on compound as well as other materials using a putty knife.
3. Attach the felt paper to your plywood with your staple nailer. Roll the paper beginning at a wall. Then, staple its felt at one-foot intervals along with paper. With a razor knife, remove the excess paper on the wall.
4. Create a chalk line around ¾ inch off a wall. Identify the floor joists’ direction by talking a look and observing at the plywood’s nails. In this case, create a line across the joist direction instead of chalking along it.
5. With chalk line you have made, make sure align the first row of your fir flooring. Put together the fir by sliding its tongue and groove together at every end. Attach the flooring’s row using a finish nailer, driving the nails through the wood’s surface.
6. Install the next row, and the remaining rows using the procedures.
7. Once all the rows are fastened in place, allow the wood to relax into place. After a few days, begin the final finishing and staining steps.


